Listen to All Songs
Follow on Instagram
All My Links
Buy My Books

Connect Your Digital Piano / Keyboard (USB-MIDI Setup)

You can use this app on a laptop, tablet, or mobile device. You can also play notes using your mouse or touch. For the best experience, connect a digital piano or MIDI keyboard so the app can detect the notes you play and display them instantly on screen.

Good to know: In most cases, this is "plug-and-play." Many keyboards support USB-MIDI and your device will recognize them automatically.

What you need

1) A digital piano / MIDI keyboard
2) A USB cable (usually USB-B on the keyboard)
3) Your laptop (USB-A or USB-C port)

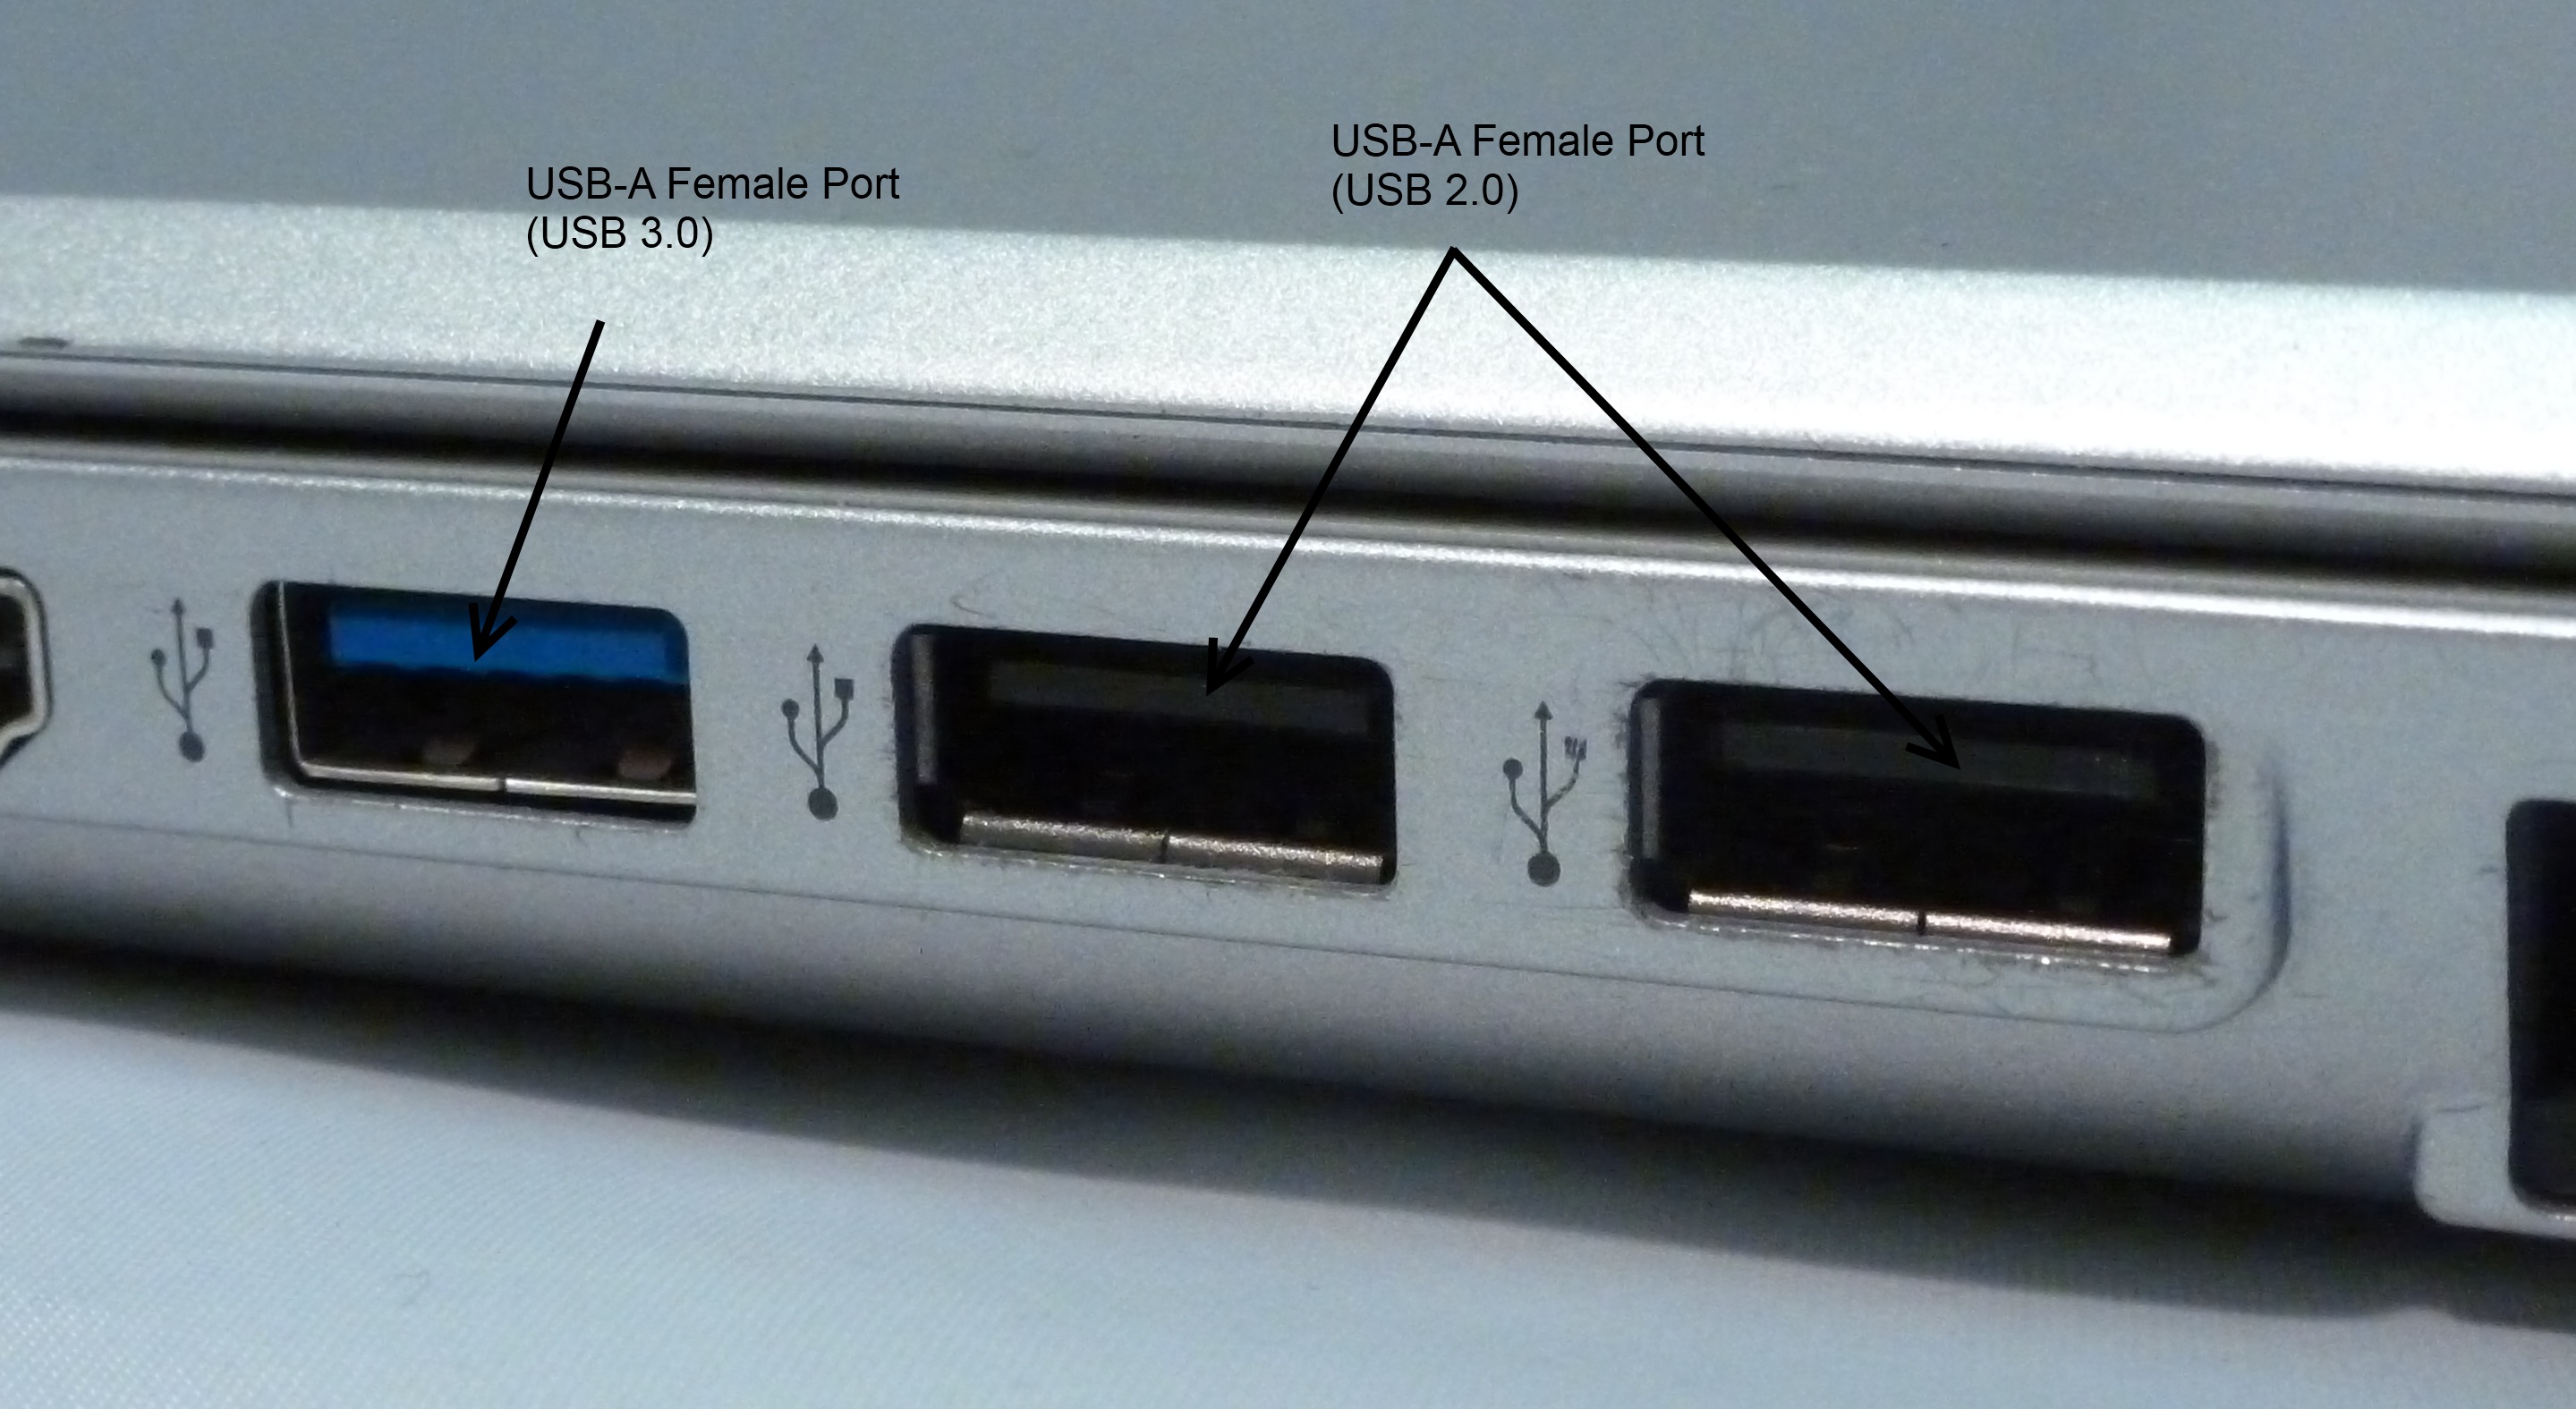
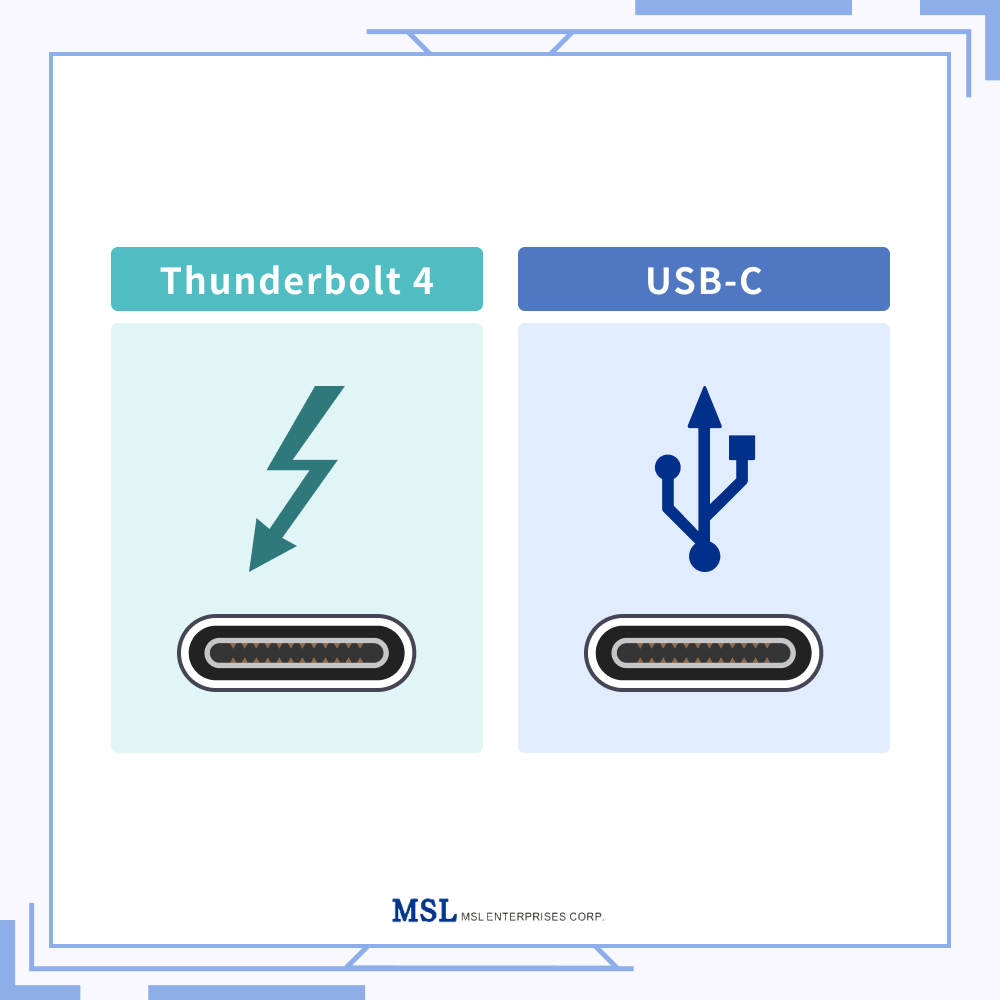
Most keyboards have a square-ish USB-B port (often labeled "USB to Host", "USB", or "MIDI USB"). Your laptop side may be USB-A (classic rectangle) or USB-C (small oval).

USB-A to USB-B cable (printer-style cable) showing both ends
USB-A to USB-B cable (very common). The USB-B end goes into the keyboard.
Digital piano rear panel showing the USB-B / USB to Host port
Keyboard port (USB-B). Look for labels like USB to Host, USB, or MIDI USB.
USB-A ports on a laptop
Laptop USB-A port (rectangle). If you have this, use a USB-A to USB-B cable.
USB-C port and/or Thunderbolt symbol on a laptop
Laptop USB-C port (small oval). If you have only USB-C, use a USB-C to USB-B cable or a USB-C adapter/hub.
Make sure you buy the right cable:
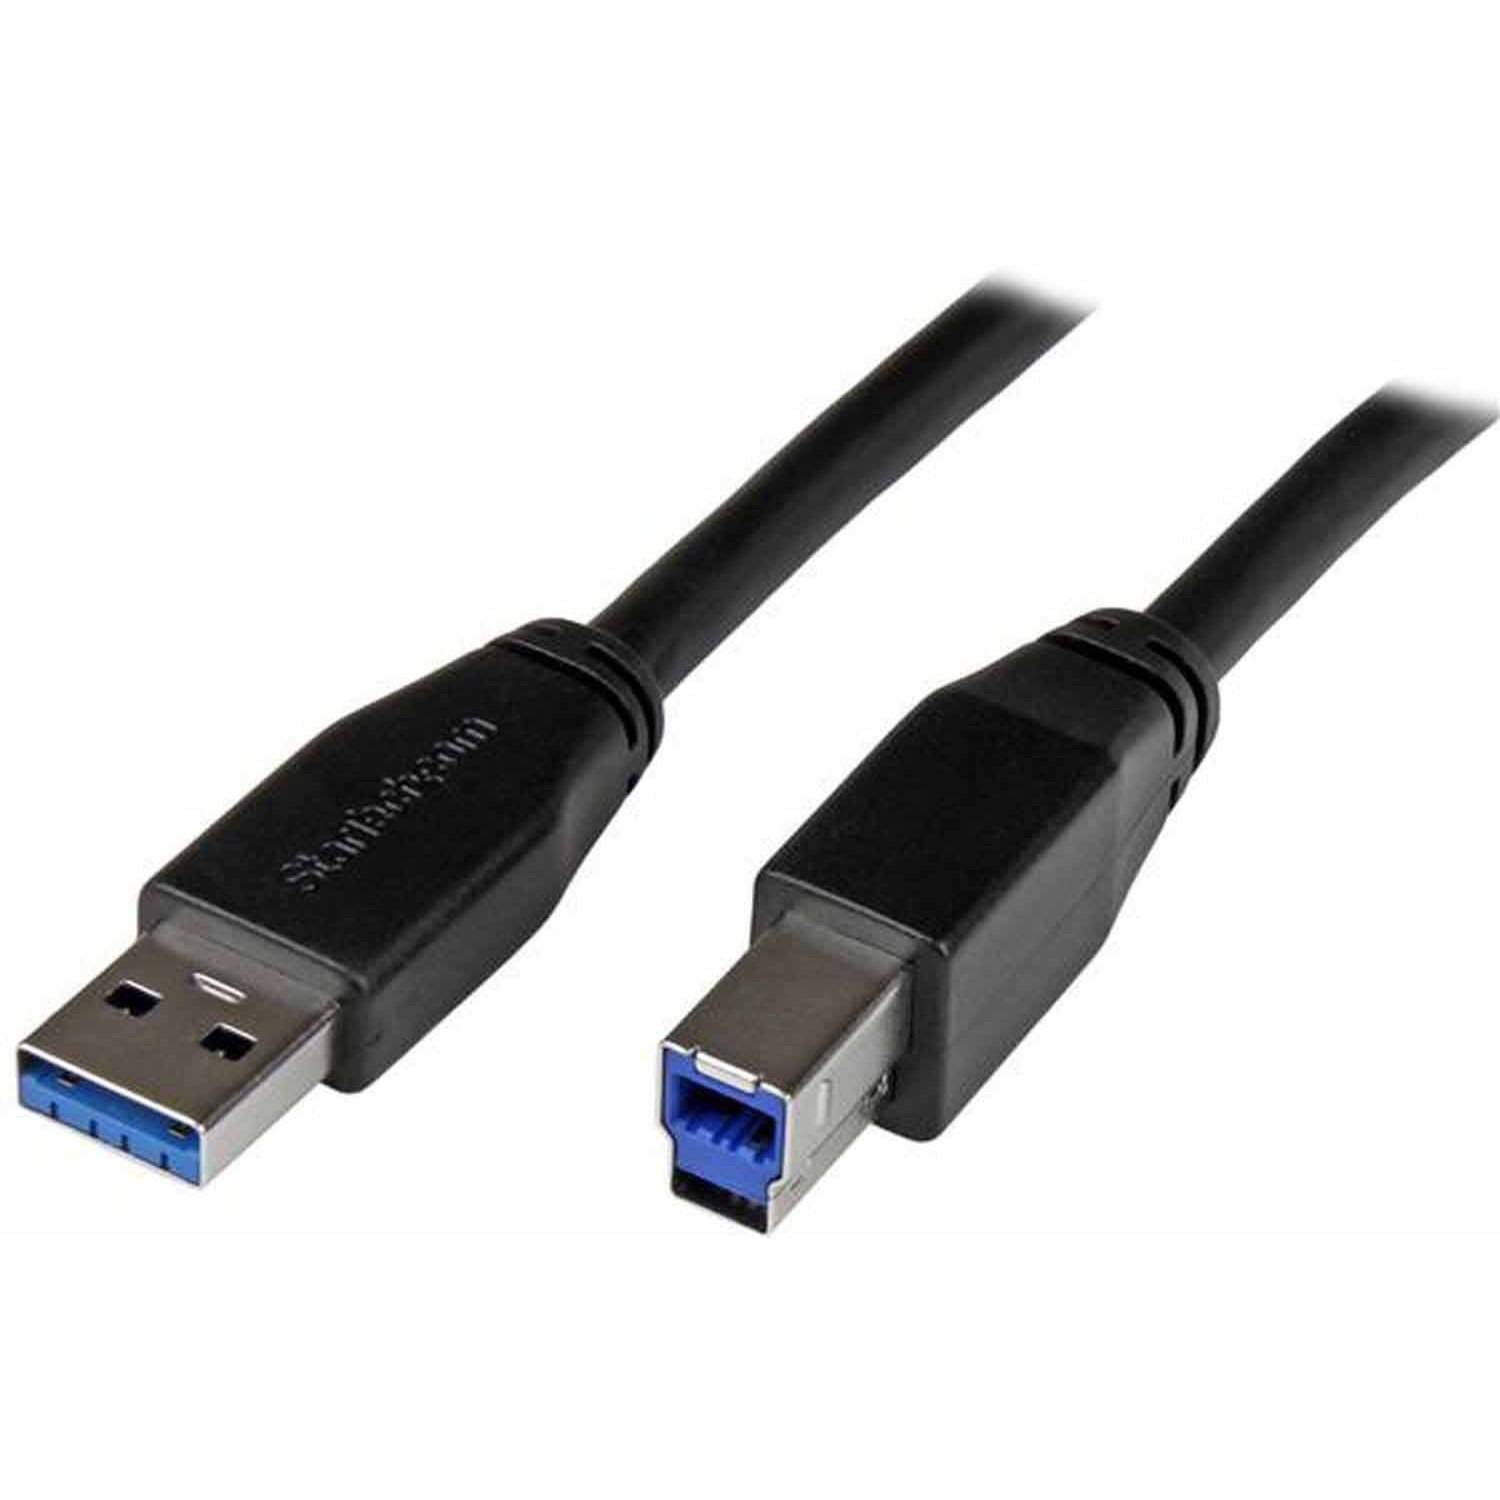
• If your laptop has USB-A: get USB-A → USB-B
• If your laptop has USB-C only: get USB-C → USB-B (or use a USB-C hub + USB-A → USB-B cable)
• If your keyboard has only round 5-pin MIDI ports (no USB): you'll need a USB-MIDI interface (MIDI IN/OUT).

Step-by-step setup

1

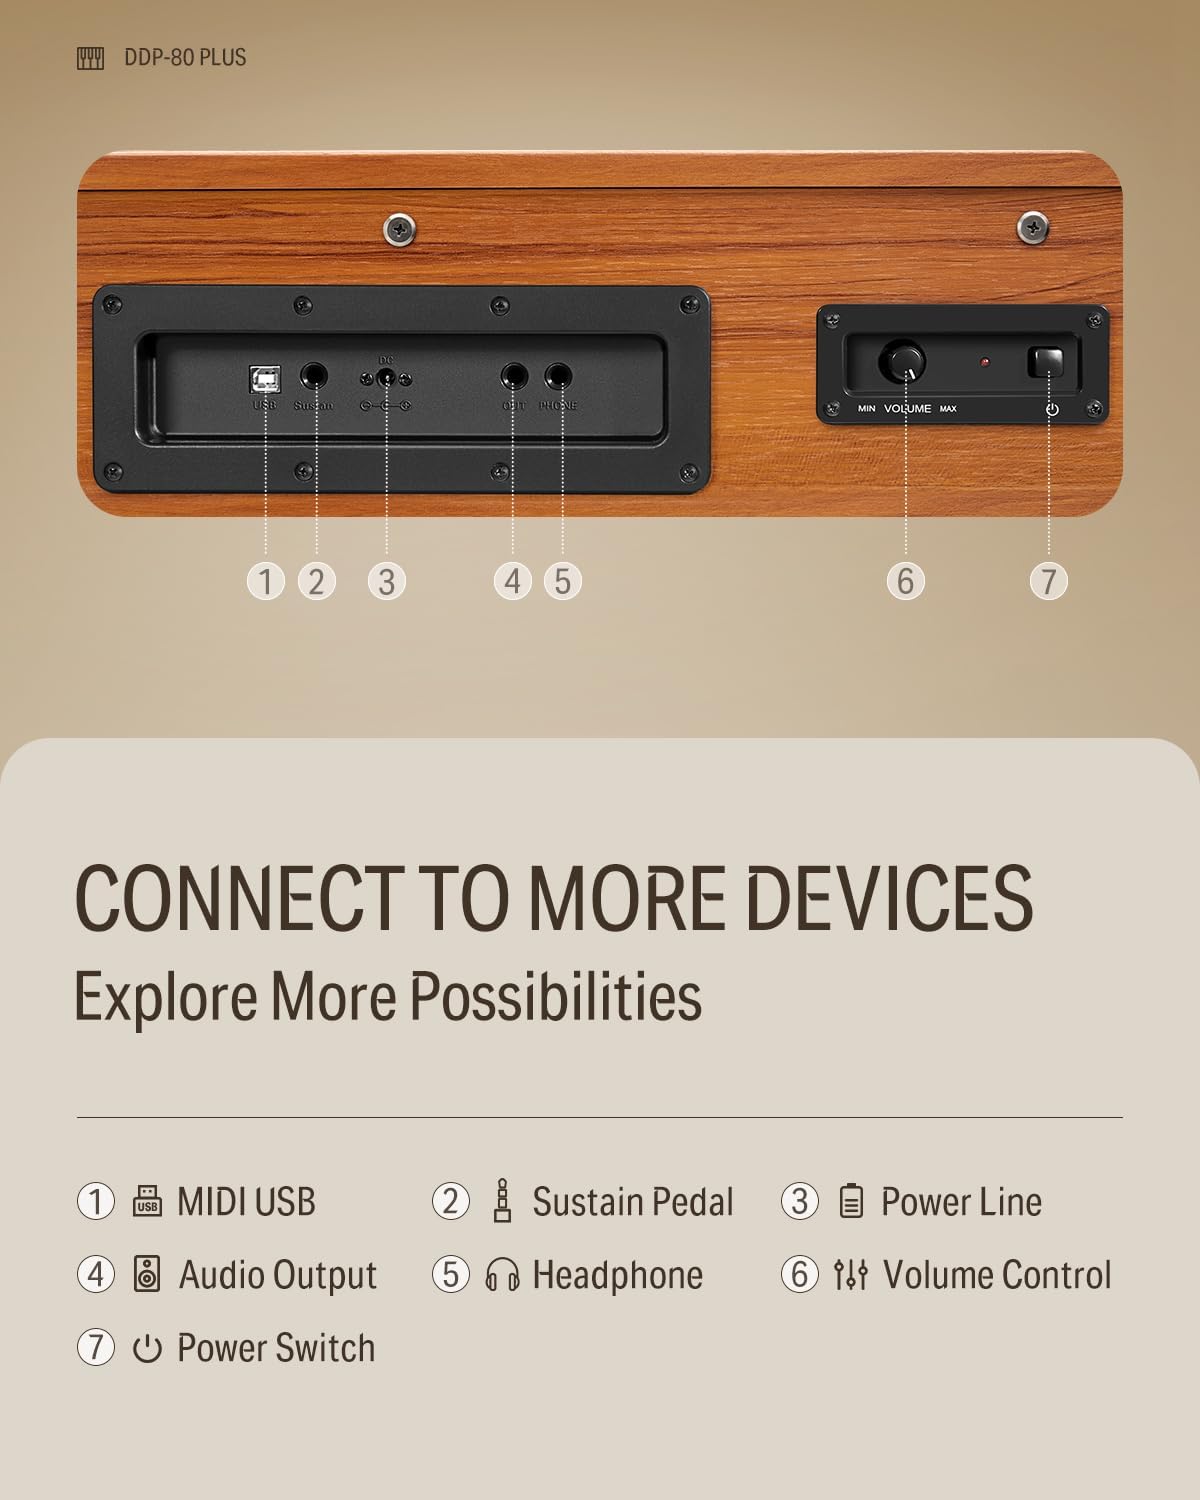
Find the correct port on your keyboard

Turn the keyboard around and look for a port labeled USB, USB to Host, or MIDI USB. This is usually a USB-B port (square-ish, "printer style").

2

Connect the cable (keyboard first, then laptop)

Plug the USB-B end into your keyboard, then plug the other end into your laptop (USB-A or USB-C, depending on your cable/adapter).

3

Power on the keyboard

Turn the keyboard on. Some models only "announce" themselves to the computer after they're powered on, so if the app doesn't detect it immediately, power-cycle the keyboard once.

4

Open the app and allow MIDI access (if prompted)

In some browsers/devices you may see a prompt asking to allow a MIDI device. Click Allow. Once connected, the app will detect your playing and show the notes on screen.

5

Play a few notes to confirm

Play single notes and then a chord. You should see the corresponding notes appear in the app immediately. If nothing shows up, use the troubleshooting tips below.

Drivers and common installation notes

Most keyboards: No driver needed. They are "class-compliant" USB-MIDI devices and work automatically.
  • Windows: Usually installs the device automatically the first time you plug it in. If Windows shows an error, install the driver from the manufacturer's official support page, then unplug/replug the keyboard and try again.
  • Mac: Typically no driver needed for USB-MIDI. Just plug in the keyboard and refresh/reopen the browser tab if needed.
  • Chromebook: Many USB-MIDI keyboards work, but compatibility can vary. If it's not detected, try a different browser or a powered USB-C hub.
  • Tablets / phones: You may need an OTG adapter (USB-C OTG or Lightning to USB adapter). Once connected, allow MIDI/USB access when prompted.

Troubleshooting (quick fixes)

1

Try a different USB port or cable

Bad cables are more common than you'd think. If you're using a hub, try plugging directly into the laptop (or try another hub).

2

Unplug → close the browser tab → reconnect

Some browsers only detect MIDI devices when the page loads. Close the app tab, reconnect the keyboard, then reopen the page.

3

Check the keyboard's USB mode (if available)

A few keyboards have a setting related to USB/MIDI. If your keyboard has a "USB Mode," set it to MIDI or USB-MIDI.

4

Install the manufacturer driver (Windows, only if needed)

If your keyboard is not recognized or shows warnings in Windows, download and install the official driver for your exact model, restart, then reconnect.

Still stuck? Contact support and include: your keyboard model name, your device (Windows/Mac/Chromebook), and whether you're using a hub/adapter.

How to Claim Your Free Song

When you purchase a physical book from riaomshandilya.com, you automatically receive a free song credit. Here's how it works:

1

Check Your Email

After your order is confirmed, you'll receive a separate email with a "Claim My Free Song" button. Check your inbox (and spam folder).

2

Click the Link

Click the button in the email. You must be logged into your Riaaz account — if you're not, you'll be taken to the login page first.

3

Verify Your Book

You'll be taken to the verification page with your code already filled in. Enter the phone number you used at checkout and click Verify.

4

Credit Added!

1 free song credit is instantly added to your account. Go to any song's page and click "Redeem Credit" to unlock it — no payment needed.

5

Optional: Upload Video (Earn a Bonus Credit!)

Upload a short video of yourself enjoying the book to earn an extra free song credit. Please read the video consent terms before uploading.

That's it! Once verified, 1 free song credit is added to your account. Go to any song page and click "Redeem Credit" to use it.
Video Bonus: Uploading a video earns you 1 extra credit on top of your base credit. By uploading a video, you agree to the terms outlined in our video consent policy.
One-Time Verification: The email link is one-time use and valid for 7 days. If your link has expired, contact [email protected].

How Bundles Work

Bundles are a cost-effective way to unlock multiple songs at once. Here's everything you need to know:

What is a bundle?
A bundle gives you 5 song credits at a discounted price. Each credit unlocks 1 song of your choice.

Key Features

  • Choose ANY song: Credits work across all books and all songs. No restrictions!
  • No expiration: Your credits never expire. Use them whenever you want.
  • Available to everyone: Both book owners and non-book owners can purchase bundles.
  • Best value: Bundles offer the lowest per-song price compared to individual purchases.
  • Book owner discount: Book owners get bundles at a discounted rate.

How to Use Your Credits

1

Purchase a Bundle

Buy a 5-song bundle from the main site or your dashboard. Book owners get a discounted price.

2

Credits Added Automatically

Your 5 credits are instantly added to your account. Check your dashboard to see your balance.

3

Choose Any Song

Browse any book and select any song you like. No restrictions!

4

Redeem with Credit

At checkout, choose "Use Credit" instead of paying. One credit will be deducted automatically.

Pricing Example (INR):
Book Owner Bundle: ₹550 for 5 songs (₹110 per song)
Non-Book Owner Bundle: Higher price, but still better value than individual purchases
Book owners save even more!

Frequently Asked Questions

Q: How long does book verification take?
A: Book verification is instant! Once you submit your phone number and click Verify, your credit is added to your account immediately.
Q: I didn't receive the verification email. What do I do?
A: Check your spam/junk folder. If it's not there, email [email protected] with a photo of your purchase receipt and we'll sort it out.
Q: My verification link has expired. What do I do?
A: Links are valid for 7 days. If yours has expired, email [email protected] and we'll send you a new one.
Q: Do bundle credits expire?
A: No! Your credits never expire. Use them whenever you're ready to unlock new songs.
Q: Can I use credits for any song in any book?
A: Absolutely! Credits work across all four books with no restrictions. Mix and match songs from different books as you like.
Q: Can non-book owners purchase bundles?
A: Yes! Both book owners and non-book owners can purchase bundles. The difference is that book owners get bundles at a discounted price.
Q: What happens to my credits if I buy more songs individually?
A: Your credits stay in your account. You can choose whether to use a credit or pay for each song individually.
Q: How do I earn the video bonus credit?
A: During book verification, you'll have the option to upload a short video of yourself enjoying the book. If you do, you'll receive 1 extra free credit on top of your base credit. Make sure to read the video consent terms first.
Q: Can I get a refund on bundle credits?
A: Bundle purchases are final and non-refundable. However, since credits never expire, you can use them at your own pace.
Q: What's the difference between book owner and non-book owner pricing?
A: Book owners get discounted pricing on both individual songs AND bundles. See the pricing page for full details.
Q: Can I share my account with friends or family?
A: Each account is personal and tied to one email address. Account sharing is not permitted as it violates our terms of service.
Q: How do I track my progress on songs?
A: Visit your dashboard to see all your purchased songs. You can mark each song as "Not Started," "In Progress," or "Completed" to track your learning journey.
Q: What payment methods do you accept?
A: We use Razorpay as our payment processor, which accepts all major credit/debit cards, UPI (for Indian users), net banking, and various wallets.
Q: Will I lose book owner pricing if I don't verify all my books?
A: No! Once you verify any book, you permanently unlock book owner pricing. You don't need to verify multiple books to maintain your discount.

Contact Support

Need Help?

Can't find what you're looking for? Our support team is here to help!

We typically respond within 24 hours

🏠 Home 📊 Dashboard 💰 Pricing